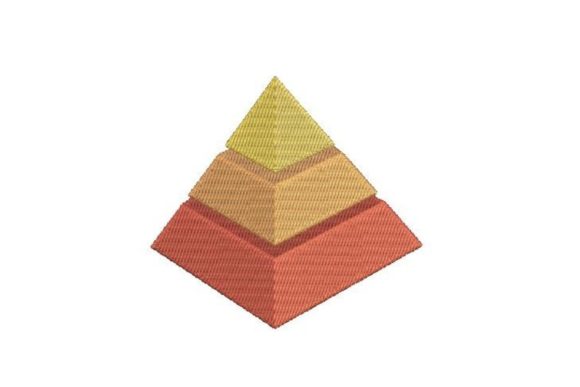
3D Pyramid: Elevating Fabric Art with Dimensional Embroidery
There is a distinct satisfaction in holding a piece of fabric that feels alive under your fingertips. It isn’t just flat ink or printed vinyl; it has texture, depth, and structure. This is where the 3D Pyramid design comes into play. It is not merely a geometric shape stitched onto cloth; it is a technique and a design file that transforms standard embroidery from a decorative afterthought into a tactile, three-dimensional focal point. When you combine this specific architectural form with high-quality stitching on any kind of fabric, the result is a project that feels highly enjoyable to create and even more impressive to display.
The beauty of the 3D Pyramid lies in its accessibility. You do not need to be a master tailor or an industrial engineer to achieve professional results. The core concept relies on building up layers of thread to create volume, much like sculpting with yarn. Whether you are working with stiff denim for a trucker hat or delicate silk for a evening gown accessory, the pyramid shape offers a structured challenge that rewards patience and precision. It turns the act of stitching into a meditative process where every pass of the needle adds to the physical presence of the design.
Why Choose a 3D Pyramid Design?
In a world saturated with two-dimensional graphics, adding dimension is a powerful way to grab attention. A flat logo can get lost in a crowd of merchandise, but a raised, textured pyramid stands out both visually and physically. This design is particularly effective because it uses negative space and shadow to create depth without requiring complex color changes or excessive thread counts. The sharp angles catch the light differently depending on the angle of view, giving the garment or item a dynamic quality that changes as the wearer moves.
Furthermore, the 3D Pyramid is versatile across materials. Unlike puff embroidery, which requires specific foams and can sometimes look bulky or uneven if not done correctly, the 3D Pyramid technique often utilizes dense satin stitches or specialized fill patterns to build height. This allows it to sit cleanly on various fabrics, from the rugged weave of canvas to the smooth surface of microfiber. The key is understanding how the underlying stabilizer interacts with the top layer of fabric, ensuring the pyramid holds its shape without puckering the material beneath it.
Real-World Applications and Use Cases
Understanding where this design fits best helps in maximizing its potential. Here are several scenarios where incorporating a 3D Pyramid into your projects makes practical sense:
Apparel and Fashion Accessories
For small business owners in the fashion sector, differentiation is everything. A streetwear brand might use a bold, oversized 3D Pyramid on the chest of a hoodie to create a minimalist yet striking aesthetic. Conversely, a boutique hat maker could place a smaller, intricate pyramid on the front panel of a baseball cap. The raised texture adds a premium feel that customers associate with higher quality. It works exceptionally well on caps made of cotton twill or polyester, where the stiffness of the fabric supports the weight of the thread buildup.
Corporate Branding and Merchandise
Marketing teams often struggle with branded swag that ends up in the trash. Items with unique textures tend to be kept longer. Imagine a tech startup giving away notebooks or laptop sleeves featuring a subtle, tonal 3D Pyramid logo. The lack of bright colors combined with the physical depth creates a sophisticated, "stealth wealth" vibe that appeals to professionals. It signals attention to detail—a trait valued in business partnerships.
Educational and Creative Workshops
For educators and hobbyists teaching machine embroidery, the 3D Pyramid serves as an excellent educational tool. It teaches students about tension settings, stabilizer selection, and the importance of trimming excess threads. Because the geometry is simple, beginners can focus on the mechanics of 3D building rather than getting overwhelmed by complex floral designs. It is a perfect milestone project that proves to a novice that they can produce dimensional work.
Home Decor and Personalization
Don’t limit this design to clothing. A 3D Pyramid looks stunning on throw pillows, tote bags, and even wall hangings. In a home setting, using contrasting thread colors—such as gold thread on navy velvet—can turn a plain cushion into a statement piece. The pyramid acts as a modern art element, bridging the gap between traditional craft and contemporary interior design.
Technical Considerations for Success
While the concept is straightforward, executing a flawless 3D Pyramid requires attention to technical details. The machine embroidery design files available for this motif typically come in multiple formats (such as .pes, .dst, .exp, and .jef) to ensure compatibility with various brands of embroidery machines. However, having the right file is only half the battle.
- Fabric Selection: Stretchy knits can be challenging because they may distort under the tension of dense stitching. Woven fabrics like cotton, linen, and denim are generally safer bets for beginners. If you must use knit fabrics, a cut-away stabilizer is essential to prevent shifting.
- Stabilizer Choice: The foundation is critical. For a tall, pronounced pyramid, you will likely need a heavy-duty tear-away or cut-away stabilizer. Some advanced users even layer stabilizers to provide extra support, ensuring the pyramid doesn’t collapse during the stitching process.
- Thread Quality: High-quality polyester or rayon thread is recommended. Cheaper threads may break under the stress of multiple passes required to build height, leading to messy finishes that require tedious cleanup.
- Hooping Technique: Ensure the fabric is taut in the hoop. Any slack can result in misaligned stitches, ruining the symmetry of the pyramid. Using spray starch or temporary adhesive can help keep the fabric stable, especially on slippery materials.
Maximizing Enjoyment and Outcome
The prompt mentions that stitching perfectly makes this a "highly enjoyable project." This is true because the process is iterative and visible. As you watch the machine build up the sides of the pyramid, you see the object coming to life. There is a psychological reward in seeing the thread stack upon itself, creating a tangible result of your effort. To enhance this enjoyment, take your time with the finishing touches. Trimming jump threads carefully and brushing the stitches to align them uniformly can make the difference between a amateur job and a professional one.
Moreover, experimenting with different thread types can add another layer of fun. Trying metallic threads for the edges while using matte polyester for the center can create a shimmering effect that highlights the geometric lines. This experimentation keeps the creative process fresh and engaging, preventing it from feeling like repetitive labor.
Final Thoughts on Implementation
Whether you are a freelancer looking to expand your product line, a blogger seeking unique content visuals, or simply a hobbyist wanting to try something new, the 3D Pyramid design offers a robust platform for creativity. Its multi-format availability means you can start working immediately regardless of your equipment. By focusing on proper fabric preparation, stabilizer usage, and precise stitching, you can transform a simple digital file into a textured masterpiece. The key is to approach it not just as a logo placement, but as a structural element of your design. When done right, the 3D Pyramid becomes more than just a shape; it becomes a signature of craftsmanship that elevates any fabric it adorns.