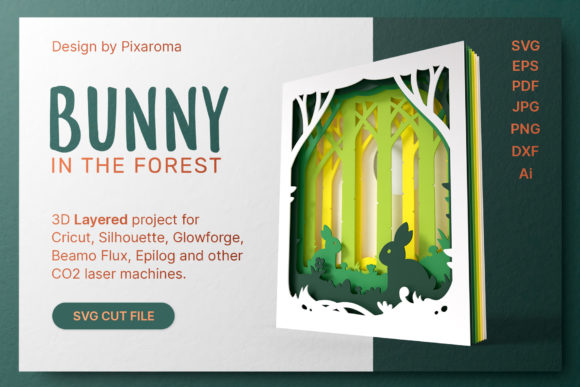
Bunny in the Forest 3D Layered
There is a distinct magic in transforming a flat digital file into a tangible, dimensional piece of art. The Bunny in the Forest 3D Layered Shadowbox SVG Cut File is not merely a pattern; it is an invitation to explore depth, texture, and light through paper crafting. Designed for creators who appreciate the intersection of whimsy and structural precision, this seven-layer design offers a sophisticated yet accessible project for hobbyists and professionals alike.
At its core, this digital asset allows you to cut and craft a beautiful 3D shadowbox or lightbox from a variety of materials, including heavy cardstock, plywood, acrylic, or even foam board. The finished product stands on its own as a striking decorative piece, but when framed inside a complementary shadow box frame, it transforms into a gallery-worthy display that emphasizes the intricate artwork. The key to unlocking the full potential of this design lies in understanding how layering creates volume, turning a simple silhouette into a rich, immersive scene.
The Mechanics of Depth: How It Works
Creating a successful 3D layered project requires more than just cutting shapes; it demands a strategic approach to assembly. The process begins with downloading the digital file to your computer and uploading the SVG format into your preferred cutting software, such as Cricut Design Space or Silhouette Studio. Once the layers are organized, you use your cutting machine to precisely cut each individual layer from your chosen material.
The true artistry emerges during the stacking phase. The provided guide ensures that each layer is placed in the correct order, maintaining the integrity of the forest scene and the central bunny motif. However, the critical step that defines the quality of the final piece is the separation between layers. If you simply glue each layer directly onto the one below it, you will lose the height and dimensionality, resulting in a flat, two-dimensional appearance that fails to capture the intent of the design.
To achieve that stunning three-dimensional effect, you must introduce spacers. For cardstock projects, double-sided adhesive foam dots, tabs, or specialized mounting tape are essential. These small, transparent adhesives create a consistent gap between each stratum of paper, allowing shadows to form naturally within the structure. This subtle distance gives the artwork breath and movement, making the bunny appear as though it is truly nestled within the foliage rather than printed upon it.
Material Choices and Structural Integrity
One of the greatest advantages of the Bunny in the Forest 3D Layered file is its versatility across different mediums. While cardstock is the most common choice for entry-level crafters due to its ease of cutting and availability, the design scales beautifully to harder materials.
- Cardstock and Paper: Ideal for lightweight displays. Use double adhesive foam dots or tabs to maintain spacing. This method keeps the weight low while maximizing visual depth.
- Plywood and Wood: For a rustic or permanent installation, laser-cut wood layers offer incredible durability. In this case, standard paper spacers won’t suffice. Instead, use acrylic spacers, thick foam blocks, or custom-cut wood dowels to separate the layers. This ensures the structure remains stable and the depth is substantial enough to catch ambient light.
- Acrylic and Plastic: Transparent or frosted acrylic layers can create a modern, ethereal look, especially when used in conjunction with backlighting.
Regardless of the material, consistency is key. Ensure that all spacers are of uniform thickness to prevent warping or uneven alignment. A wobbly shadowbox detracts from the elegance of the design, so precision in your spacing strategy is just as important as precision in your cutting.
Creative Applications and Project Ideas
The Bunny in the Forest 3D Layered design is inherently seasonal, making it a perfect fit for Spring and Easter themes. However, its appeal extends far beyond holiday decor. Here are several ways to adapt this project for different audiences and contexts:
Home Decor and Nursery Art
The soft, organic lines of the forest elements combined with the gentle figure of the bunny make this an excellent addition to a child’s nursery or a spring-themed living room. By using pastel-colored cardstocks—such as sage green, blush pink, and cream—you can create a calming, cohesive aesthetic. When backlit with an LED strip installed at the rear of the shadow box frame, the layers glow softly, creating a nightlight effect that is both functional and decorative.
Educational Tools for Creativity
For educators and parents, this project serves as an excellent introduction to spatial reasoning and engineering concepts. Children can learn about positive and negative space, layering, and the physics of balance. It encourages patience and fine motor skills as they carefully place each spacer and align each cutout. It is a practical STEM/STEAM activity that results in a rewarding, personalized artifact.
Gift Giving and Small Business Ventures
If you are a small business owner or freelancer looking to expand your product line, this design offers high perceived value with relatively low material cost. Handmade 3D shadowboxes are popular on platforms like Etsy and at local craft fairs. By offering customization options—such as choosing specific color palettes or adding monograms to the base layer—you can tailor the product to individual client tastes. The "Animal Lovers" aspect of the design broadens its market appeal, attracting those who may not typically celebrate Easter but appreciate woodland aesthetics.
Best Practices for a Professional Finish
To ensure your Bunny in the Forest 3D Layered project looks polished and professional, consider these practical tips:
- Test Fit Before Gluing: Always dry-stack your layers without adhesive first. Check for any misalignments or overlapping issues that might need adjustment before committing to the final bond.
- Use Quality Adhesives: Cheap tape can yellow over time or fail to hold the weight of multiple layers. Invest in archival-quality, acid-free foam dots to preserve the longevity of your artwork.
- Lighting Enhancements: Since this is a layered design, lighting plays a crucial role. Experiment with warm white LEDs for a cozy feel or cool white LEDs for a crisp, modern look. Positioning lights behind the rearmost layer will cast dynamic shadows through the subsequent layers, enhancing the 3D illusion.
- Frame Selection: Choose a shadow box frame with sufficient depth to accommodate your chosen spacer thickness. A shallow frame will crush the layers, negating the 3D effect. Look for frames with UV-protective glass or acrylic if the piece will be displayed in direct sunlight.
The beauty of digital crafting lies in the ability to iterate and improve. Each time you cut and assemble the Bunny in the Forest 3D Layered file, you refine your technique. Whether you are a seasoned designer exploring new textures or a beginner eager to try your first 3D project, this file provides a robust foundation for creativity. By respecting the geometry of the layers and embracing the power of depth, you can create a piece that is not just seen, but experienced.
Ultimately, the goal is to bring a sense of wonder into your workspace or home. The interplay of light and shadow, the tactile satisfaction of stacked materials, and the charming subject matter combine to create something special. Don't be afraid to experiment with contrasting colors or mixed media. Let the design guide you, but allow your personal style to shine through the choices you make in material and presentation. In doing so, you transform a simple SVG file into a unique work of art that reflects your dedication to craftsmanship and creative vision.